Showing posts with label CHRISTMAS TIME. Show all posts

Prawn & Chicken Paella - A great alternative to Biryani


Paella is a Spanish rice preparation home to Valencia. The original recipe includes chicken and rabbit meat and other goodies available in the region, such snails. This recipe has been customized to use locally available ingredients such as pork, chicken, fresh prawns and few other veggies. As regards the herbs, you can use either fresh rosemary or dried rosemary. Since Paella rice is not available in Kochi, i have used good quality raw rice. Please avoid using Basmati rice, because the aroma can sometimes remind you of biryani.

ingredients

Fresh unpeeled prawns - 500 gms
Chicken Breast - 2 or 3 (the more the merrier), diced into small pieces as seen in the picture

Pork bits with fat, thinly sliced  - a handful (you can use bacon or pancetta)
Chilly powder or paprika - 2 tsp
White wine - 6 tbsp or Synthetic Vinegar - 1 1/2 tbsp
Carrots, diced - 2
Potato, diced - 1 small (optional)
Roughly chopped tomatoes - 2
Onion - 2 large, roughly chopped
Garlic - 15 small cloves (organic) or 10 plump cloves
Olive Oil or Vegetable Oil - 4 tbsp or more
Saffron - 1 generous pinch

Paella rice or raw rice - 4 cups (400 gms approximately)
Water - 8 cups

Salt to taste

ingredients to marinate the prawn and chicken

salt to taste
chilly powder - 2 tsp (if you want mild heat use paprika)

Vessel to be used - A wide pan (Uruli) or a Paella pan

Salt: Since the marinated meat and prawn has salt, add salt to the rice cautiously

method

Clean the prawns and marinate it with 3/4 tsp chilly powder and salt. Marinate the chicken pieces separately with the remaining chilly powder and salt.

Rice: If you are using Paella rice, you can add it directly to the preparations. I always like to wash and dry the rice for sometime. In case you are using raw rice, wash it 3 times and then put in a flat plate, to get rid of the moisture.

Heat oil in a pan and sear the chicken (in medium heat). When it is almost done remove it from oil. Make sure the chicken is coated with the marinade ( as seen in the picture). Similarly, fry the prawns , for about 2 to 3 minutes. Remove from oil. At this point, drain all the caramelised bits of chicken and prawns. Let only the oil remain in the pan. Add the thinly sliced pork and turn the heat to low. Allow the pork to cook slowly and release all the fat. Once the pork has caramelised, gently move it to the side of the pan and add the onion and garlic and saute it in medium heat. When the sides of the onion and garlic start browning move it to the side of the pan and add the carrots and potato. Saute it for a minute. Now bring all the ingredients to the centre of the pan and add the cleaned rice. Fry it gently along with the veggies and meat for about 2 minutes using a wooden spatula (Take care not to break the rice). Add the wine or vinegar and the red chilly powder or paprika and salt. Give a mix and then spread it across the pan. Pour half of the water (4 cup), alongside the side of the pan. Do not stir. Place the rosemary sprigs in 4 different directions: NSWE :).

When the rice has absorbed the water, add 4 more cups of the water in the same fashion.
Sprinkle the saffron strands. When the rice is almost done, add the fried prawn and chicken and give a gently mix. Taste it. The rice will be done in few more minutes.

Please note , the consistency of the rice is 'just to the right bite'. It will have one bite when you chew it, but it will be done with a little bit of moisture (as you see above in the pic). If you want a more soft consistency just cover the pan, after turning of the heat. But the rice will bloat a little bit, it wont be thin as you see in the image.

Get in touch with me for any doubts. 

Orange Caramel Custard | Make in advance Christmas Dessert


ingredients

Milk - 500 ml
Cream - 200 ml
Egg - 4
Sugar - 10 tbsp or to taste - taste after the eggs are added and just before pouring into the mould
Vanilla - 1 tsp

ingredients for the syrup

10 - 14 tbsp depending on the size of the mould to coat it thoroughly, otherwise the custard wont leave the pan after chilling
Orange juice - 4 tbsp


method 

Place the sugar and orange in a sauce pan over low to medium heat. Do not stir. Let the sugar gently caramelize. When the sugar has caramelized, pour it into a pan or mould of your choice and swirl it to coat the bottom of the pan and the sides. Keep it aside.

In the mean time boil milk and reserve. In another pan, heat the cream in a double boiler. When you see bubbles on the side turn off heat and mix it with the milk. Stir till it comes down to room temperature.

In another bowl, whist the eggs with sugar. Add vanilla extract and give a quick whisk.  Add the egg mix into the milk and strain it into another pan.

Pour this into the caramel coated pan and cover it with an aluminium foil or a thin steel or aluminium lid.

There are two ways of making the custard: Steaming or Baking.

Steaming: Prepare a double boiler and place the custard filled pan into it. The water level should be atleast half the height of the pan. Steam for 40 minutes.

Baking: Follow the same method as steaming to prepare the double boiler and place it in the oven at 160C for 45 to 50 minutes.

Once the custard is cooked, let it cool. Then place in a refrigerator for 6 hours or overnight. Invert the custard to see something which looks like the above.

Cut it and serve with the excess syrup.

Mint Pulao | Pressure Cooker Method


This is a very easy rice recipe you can make in Pressure Cooker. Add it to your Christmas Menu.

Ingredients for the mint chutney

A large bunch of mint
1 1/2 inch piece of ginger
6 cloves of garlic
Curd 4 tbsp or Juice of 1 lemon

Ingredients for the pulao

500 gms of Basmati Rice (approximately 4 cups)
1 large onion, sliced
a medium stick of cinnamon
6 cloves
a tbsp of pepper corns
Veg oil - 2 tbsp
Almonds or cashew nuts - as much as you need
Salt to taste
8 cups of water

the method

Wash and soak the rice in water for 15 minutes. Drain it and set aside.

Heat oil in a  pressure cooker and add the onions, cinnamon, cloves, pepper corns and nuts. Meanwhile grind the ingredients for the mint chutney.

When the onion turns translucent, add the mint mix and saute for 10-15 seconds. Add the rice and salt and stir gently. Add the water, give a quick stir and put the lid of the pressure cooker. Let the whistle blow once. Turn off heat. Open the cooker when the pressure is gone. Serve this with potato wedges or a chicken curry or if it a weekday, serve with an omelette.

If you don't like to cook in pressure cooker, cook the rice separately and then season it using the method mentioned above.


Scandinavian Rosette Cookies - Achappam with Maida


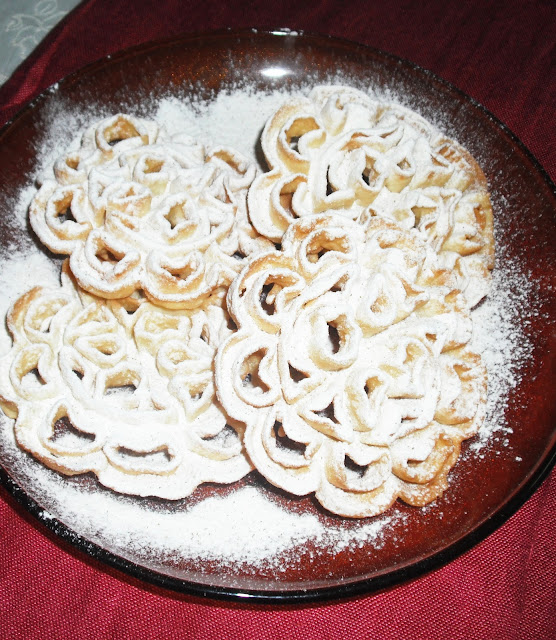
Christmas is just over ..... but my hang over is still on. Out of the various snacks i prepared, i just left out Achappam. I just think it is difficult and i keep on postponing. This time i took the Rosette iron from my mother in law and was searching for the recipe. The proportion should be correct, otherwise, the batter wont leave the iron. That is when i came across the European version which used flour / maida instead of rice flour. Since Achappam requires fresh rice flour you dont have any short cut using store bought roasted rice flour. So the Scandinavian version was just right for the lazy me. I tried it today and the first one was a flop. I think i overheated the iron before dipping it in batter. Rest is what you see in the picture. 

This is just another reason i would like to say never  give up. Even if you follow a recipe strictly, sometimes we should use our intuition and logic to get it right. Not for just recipes, but everything in life - I believe.

You can prepare these rosette cookies if you have a rosette iron. If you  dont have one, use a cookie cutter of any shape (star, flower, heart, rounds, ovals, etc) and hold it with a tweezer.


ingredients for the rosette cookies

flour / maida - 150 gms
egg - 1 large
milk - 150 ml + 25 ml if need be
vanilla essence or rose essence - 3/4 tsp
salt - 1/4 tsp
sugar - 1  tsp
vegetable oil for frying

ingredients for dusting

sugar - 4 tbsp
cinnamon powder - 1/2 tsp

method

Take a narrow bowl. Just wide enough to dip the rosette iron / mould. Place the egg, salt and sugar in it and whisk. Add milk little by little until all milk is used. Add the flour little by little as done for a pancake until the flour is fully used. Add the essence.  I used rose essence. You can  use according to your choice. Place the batter in the refrigerator for 15 minutes.

Heat oil in a deep pan. When hot, place the iron in the oil. Make sure the iron is moist free, otherwise you can see some explosions. When the iron is medium hot, say 1-2 minutes, lift it from oil, shake off excess oil   and place it in the batter, such a way that the batter does not cover the top of the iron. (If it is covered the cookies wouldnt leave the iron while frying). Place the iron covered with batter in the oil and gently shake it continuously. Also, use a broad knife to help the rosette cookie leave the iron. Gently slide it away from the iron. Do the entire process in low to medium heat, otherwise, the cookies will turn dark. Once the rosette is golden brown drain it from oil. Repeat the process. You may not be able to use all the batter to prepare cookies because the batter needs some elevation to coat the iron. Use up the balance batter by spooning it into oil.

For the dusting - Place the sugar and cinnamon in a mixer and powder it. Place the sugar mix in a sieve and dust it generously or as per your taste.


Fish Cutlet - - - - -lightly spiced


This is a recipe which you can prepare and freeze and fry it whenever you need. The Fish Cutlet is slightly different from the usual ones (which I came across the web) bcause I have not added garam masala. I prefer to taste the taste of fish rather than lot of masala and the addition of ginger, garlic and coriander simply enhances the flavor.

The usually egg dip to coat is replaced with a rice flour dip to get a very crunchy texture. Try it and you’ll like it.

Use these fish cutlets as a starter or simply prepare a fish burger for lunch.

…enjoy!!


the recipe
Fish keema – 500 gms
Potato – 500 gms (boiled and finely mashed)

Oil – 2 tbsp
Onion – 1 large, finely chopped
Green chilly, finely chopped – 2 (deseeded would be better)
Garlic – 8 medium cloves, finely chopped or grated
Ginger – 1/3rd inch piece, finely chopped
Corianders leaves – leaves with only tender stem – 6 sprigs
Chilly powder – ½ tsp
Pepper powder – ½ tsp
Lemon juice / Vinegar – 1 tsp
Salt to taste

ingredients to coat the cutlet

Rice flour – 2 -3 tbsp - Coarse rice flour (the one used to make puttu)
Water – ½ cup
Bread Crumbs – as much as you need
Oil to shallow fry
Salt to taste
Pepper powder – ¼ tsp

Note: I have used fish keema to prepare this recipe. If you are preparing with fresh fish, clean the fish and boil it with ¼ inch ginger, 4 garlic cloves, turmeric and salt and just adequate water to immerse the fish. Separate the flesh from the skin and bones and mash it with a fork and then follow the method below.

the method

Heat 2 tbsp oil in a heavy bottom or non-stick pan. Stir in the onions and saut̩ till translucent. Add the green chilly, ginger and garlic and stir for few seconds. Add the chilly, turmeric and pepper powder. Saut̩ for a while and add the fish keema / mashed fish. Stir well in low flame till the fish turns dry. Pour the lemon juice and sprinkle the coriander. Saut̩ for few seconds and turn off heat. When the fish turns warm, add the mashed potatoes and mix well, preferable using a potato masher. Knead the mix into a dough. Take a table spoon of the mix and shape it into a cutlet. I used a cutlet mould and ended up with very large ones. You can shape it according to your preference. Shape all the potato Рfish mix.

Mix the rice flour with about 10 tbsp water (the mix should not be very watery), salt and pepper powder. The rice flour batter should be solid enough / liquid enough to coat the cutlet. Dip each cutlet into the rice mix and then coat it with bread crumbs and keep it ready. To avoid the bread crumbs from leaving the cutlet, place it in the freezer for half an hour and then keep it at room temperature for 10 minutes and then shallow fry in a non-stick pan.

These cutlets can be stored in the refrigerator (freezer) in an air tight container for upto a month.

Buttermilk Fruit Cake - - - - - Eggless


After the MARBLE FRUIT CAKE recipe, this is yet another fruit cake I prepared during this season. The reason is nothing but last Christmas i had kept the Kerala Fruit Cake / Plum Cake recipe to be published on the day before Christmas and it never happened. So this year I am on a spree to prepare fruit cakes and i have researched and shortlisted many recipes to be tried. Do stay tuned to this space for more fruit cake recipes.

This Buttermilk Fruit Cake recipe is adapted from Joy of Baking and this was just perfect. I have slightly adjusted the quantity of flour and buttermilk to suit the kind of maida / flour available in Kerala. I feel the volume of flour is less for what we get here. There is also a healthy twist to this recipe. I have added wheat flour to more than half part of the flour. The cake was perfect and there was lot of appreciation from my family and colleagues who had this cake. So, if you love some positive comments do try this one. It is a foolproof recipe (with lots of thanks to Joy of Baking).


the recipe


dry ingredients
Flour (Maida) – 100 gms
Wheat flour – 140 gms
Sugar – 160 gms
Nutmeg – 1/3 of a seed or 1 tsp nutmeg powder
Cinnamon – ¾ inch piece or 1 tsp Cinnamon powder
Baking soda – 1 tsp
Salt – 1 generous pinch

Dry fruits – coarsely chopped

Dark raisins – 80 gms
Dates – 100 gms approx ( I used about 15 dates)
Golden raisins – 100 gms

Wet ingredients 

Buttermilk – 250 – 260 ml
Melted butter (unsalted) – 120 gms
Vanilla extract – ¾ tsp


the method

Preheat oven at 170 C. Prepare a round cake pan by applying butter and dusting flour. Place a round sheet of butter paper , parchment paper or any white paper on the bottom of the pan.

Sieve the flour, wheat flour,  salt and baking soda once. Powder the sugar alongwith the nutmeg and cinnamon (if using whole spices). 

Place the flour mix in a bowl. Use about 1/4th of the flour to coat the dry fruits (this is to prevent the dry fruits from sinking into the bottom of the cake).

 To the remaining flour mix, add the sugar mix and mix well.

Melt butter in a pan and let it cool to room temperature. Pour the buttermilk and vanilla extract and mix well. 

Pour the wet ingredients into the dry ingredients and add the flour coated dry fruits, mix quickly and immediately pour into a prepared pan. 

Bake at 170 C for 35 – 40 minutes or until a toothpick inserted comes out clean. If the cake starts to brown after about 15 to 20 minutes, cover the cake pan with a parchment paper.

Serve warm or cold.

We had this for breakfast. You can keep the dry ingredients ready a day or two before and keep the chopped dry fruits in the refrigerator. Whenever you feel like baking just mix and bake.

cheers...

....if you like this blog dont forget to click the LIKE button on Facebook Fan page 


also read
Marble Fruit Cake


Marble Fruit Cake


It is Christmas season …(well too early to say that…though….) and time to indulge in some cakes. Infact there need not be any reason to prepare this cake but to prepare a fruit cake I think you need a seasonal inspiration.

The idea of a marble fruit cake has been in my mind for sometime and I tried it with some skepticism. But the result was fabulous with lots of appreciation from all quarters…. to whomever I shared. This is an easy cake since the amount of fruits is comparatively less and does not require long preparation time for chopping or soaking ….it is just all quick.

The flavors of vanilla and chocolate alongwith the flavors of orange rind and rum complement well to give a really nice taste.


the recipe

Butter – 120 gms
Flour – 3 cups (300 gms)
Baking powder – ¾ tsp
Egg- 3
Caster Sugar – 2 ¼ cup (240 gms)

Combination of fruits & nuts

Dates – 10
Raisins – 20
Cherry – 20
Walnuts – a handful
Almonds – a handful

Rum – 2 tbsp or orange juice – 2 tbsp
Salt – 2 pinch

Cocoa powder -2 heap tbsp
Milk – 3 tbsp

Vanilla extract – 1 tsp
Orange rind, chopped – 1 tbsp
Blanched almonds - 10


the method

# Chop the fruits and soak them in rum or orange juice for 2 – 3 hours.

# Prepare a baking pan (butter the pan and dust it with flour). Place a round sheet of paper on the bottom of the pan. I usually prepare the pan and leave it in the refrigerator so that the butter does not melt and lose its consistency.

# Sieve the flour, salt and baking powder three times.

# Mix the soaked fruits and nuts. Dust one fourth of the flour mix with the fruit and nut and roughly mix.

# Add the cocoa powder to the milk, mix well and keep it aside.

# Since this is a marble cake, two bowls are required for the cake batter.

# Preheat oven at 170 C.

In a mixing bowl, place the butter and beat it with an electric mixer until soft. Add the sugar in 3 batches and continue mixing. Once all the sugar is added beat in high speed for 5 minutes until the butter sugar mixture has doubled in volume. Add the egg one by one. Beat well after each addition. Add the vanilla extract. Add the flour in 2-3 batches and mix with a spatula. Add the orange rind and flour coated, fruits and nuts.

Pour half of the cake batter into another bowl. Add the cocoa mix and mix well.

Take the prepared pan and first place one third of the vanilla batter in the middle of the pan. Then place half of the cocoa batter followed by a third of vanilla, another half of cocoa and finally the third portion of the vanilla batter. Make sure the batter is place in the middle one after another.

To spread the batter till the edge of the pan and to get the marble shape use a knife or your pointing finger, dig into the middle of the batter and gently move it in circular motion. Tap the cake pan gently so that the batter smoothens itself on top.

(At this stage I was slightly in a hurry and that is why the marble shape did not appear clearly. For a better understanding of the marble design please take a look at the simple marble cake which I have prepared earlier).


Decorate the top of the cake with blanched almonds. Bake at 170C for 30 – 35 minutes. Check after 30 minutes till a skewer inserted comes out clean. Take out the cake and let it cool.

This is a very moist and super delicious cake. Do try it this Christmas season and  let me know.

cheers..


the recipe goes to Bake Fest & Christmas Delicacy & Hearth & Soul Blog Hop


Coconut Cake with Custard Apple & Cream


I have been wanting to prepare a Coconut Cake for a long time. I was in doubt whether I should use fresh coconut or desiccated ones. Finally I decided to prepare homemade desiccated coconut and the cake thus happened. The idea of custard apple and cream is from Chef Vicky Ratnani. I saw it in a program called ‘Do it Sweet’ aired on NDTV Good Times.


ingredients for the Coconut Cake

Flour (maida) – 3 cups
Eggs – 3 large or 4
Caster Sugar – 2 ¼ cup
Veg oil – 1 ¼ cup
Vanilla Extract – 1 tsp
Baking powder – 1 tsp
Dessicated coconut – 6 tbsp (Check ‘Basics’ page for method)

ingredients for the Custard Apple Cream

Custard Apple – 3 (just ripe fruit)
Sugar – 3 tbsp
Whipping Cream Powder – ¾ cup
Chilled water – 40 ml

If you are using fresh cream you might require 300-400ml medium fat cream


Method to prepare the cake

Preheat Over at 180 C.

Sieve the flour and baking powder three times.

In a mixing bowl, beat the eggs one by one: Place one egg in the bowl and place the electric mixer on the yolk and start fluffing up the yolk and white until they are combined well. Continue with the other eggs. Once all the eggs are added continue for one more minute.

Add the caster sugar little by little in speed 1 or 2. When all the sugar is added switch to high speed and continue beating for about 5 minutes till the mix has doubled in volume. Add the vanilla extract and oil and mix together for a minute.

While adding the flour, use a spatula to mix the batter. Add the flour little by little until fully used up. Add the dessicated coconut and mix well. Pour into the prepared pan and bake at 180C for 40 minutes (Keep checking after 35 minutes because oven temperatures vary). Let it cool in the pan for ten minutes.

Take the cake out of the pan and let it cool for a day (Keep it wrapped in an aluminium foil in a refrigerator).

Method to prepare custard apple cream

Deseed the Custard Apple. Grind it coarsely along with 3 tbsp sugar.

Place the whipping cream powder in a bowl and gradually add the cold water and whip it into cream. Add 2 tbsp cream into the custard apple and blend for a second. Transfer the custard apple mix into the whipped cream and gently fold in.

Assembling the cake

Cut the cake into two horizontally. Place a layer of the custard apple cream on one layer of the cake. Place the other half of the cake over it. Place the whipped cream in the middle of the cake and spread it to the sides evenly. Decorate the cake with custard apple seeds (not to be eaten – take care while serving the cake to kids).

Enjoy!!

Paalappam / Velleppam / Lace Appam / Hoppers / Aappam


Preparing palappam is an art by itself. The lace like edges of this exotic rice wafer has earned it a name as 'lace appam'. Traditionally 'toddy or kallu'  - a milk like liquid from the coconut tree was used to ferment the rice. In the modern recipe yeast is used to ferment the batter. The addition of coconut water gives a very soft, thin and wafery edge to the palappam. It is crispy outside and fluffy inside.  While preparing the palappam a portion of the batter collects itself in the middle to give the fluffy part. 

Palappam or hoppers can be prepared for breakfast or for special occasions. The accompaniments are usually spicy curries though this can be had with milk or coconut milk. Try it and you'll love it.

the following quantity yields 16 – 18 palappams

Raw rice – ¾ cup
Water – ½ cup ( + 2 tbsp if need be)
Coconut water – ¼ cup
Salt – ½ tsp
Sugar – 2 tbsp
Yeast – 1 tsp
Cooked rice – ¼ cup
Coconut, grated – ½ cup

 the method

Soak the raw rice for about 5 hours. The quality of the rice has an effect on the outcome of the palappam. Choose sticky rice with a pure whitish color. In Kerala, we get a rice called ‘Mavu Rice’ which is very good for a perfect palappam or a dosa.Heat ¼ cup water alongwith sugar and salt. When the water starts to boil turn off heat and add the yeast. Let the yeast melt.In a mixer jar add the coconut, cooked rice and a little soaked rice and the yeasted water and grind it to a smooth paste. Pour into a bowl. Add the remaining rice and water to the mixer jar and grind it to a smooth paste.  Pour the batter into the bowl and add the coconut water and mix well. Let the batter ferment for about  6-8 hours. The fermenting depends on the temperature. Place the batter in a warm place. After the batter is fermented check whether the batter is still thick but in a pouring consistency. Add the 2 tbsp water if need be.


preparing the hoppers

Heat an appachatti or a deep pan and pour a ladle full of batter.  Lift the pan from the heat and swirl it. Cover it and cook for about 1 – 1½ minute or until the whitish colour disappears from the middle of the palappam / hoppers. Serve hot with vegetable stew, beef stew, chicken curry, vegetable kurma, egg curry , soya mince curry or just serve with sweetened milk or coconut milk.

Mughalai Chicken Biryani


Mughalai biryani is not spicy but it is full of flavors.  This is a slow cooked delicacy that imbibes the flavors of all the ingredients. The use of whole kashmiri chillies and whole pepper corns gives a great aroma and taste. The recipe is from various sources that include the television and the web. I have tried to incorporate the best of all methods.

 the recipe to cook rice
Basmati Rice – 2 cups (to serve 8)

Whole spices

Green cardamom – 4
Cloves -3
Cinnamon – ½ inch piece
Bay leaf – 1
Ghee or Veg Oil – 2 tbsp
Salt to taste
Lemon juice – 1 tbsp (optional)

Method to cook rice. Place adequate water in a pot. When the water comes to boil, add the oil, whole spices, lemon juice and salt. Add rice. When the rice is cooked but firm drain the water and keep the cooked rice aside.

recipe to cook the chicken

Chicken – 750 gms
Onion – 4 +3
Whole Kashmiri red chillies – 10
Pepper corns – 1 ½ tsp
Garam Masala – 1 ½ tsp
Chilly powder – 1 ½ tsp
Ginger Garlic paste – 2-3 tbsp
Almond paste – from 20 - 25 almonds
Salt to taste
Curd – 1 cup
Coriander leaves – 5 tbsp
Mint leaves  - ½ cup
Ghee – 2 -3 tbsp + 3 tbsp
Cashewnuts & raisins – as much as you need
Saffron – 1 small pinch (optional)
Milk - 3 tbsp
Salt to taste
Oil – 3-4 tbsp (to fry onions into golden brown color – for garnish)

Whole spices

Green Cardamom – 4
Black Cardamom – 2
Cloves – 3
Cinnamon – ½ inch piece
Blade of Mace – 1 piece
Star Anise – 1 (deseeded)
 
the method

Heat oil in a pan and fry 3 chopped onion till they turn brown (take care that the onion doesn’t get burnt – fry the onions in medium heat. Keep it aside.

Heat a heavy  bottom pan pressure cooker and add the ghee. Turn to medium heat and add the whole spices. Stir till the spices release its aroma. Add the 4 chopped onions and sauté till they turn translucent. Turn to medium heat. Stir in the whole kashmiri chillies. Saute for few seconds and then add the pepper corns and ginger garlic paste. Add the almond paste and stir for a while. Add the garam masala and chilly powder. Turn to low heat and add the chicken pieces and salt. Continue cooking in low heat and saute occasionally till the chicken is half done (let the chicken cook in its own juices). Turn to medium heat and add the chopped coriander and mint leaves. Turn to high heat and add the beaten curd. Stir well. Turn to medium heat and cook till the chicken is done.

Layering the biryani

Take a heavy bottom pan or a pressure cooker. Add 3 tbsp ghee. Place a thick layer of rice followed by the cooked chicken with gravy. Next place another thick layer of rice follwed by the cooked chicken and gravy. Top it with a thin layer of rice. Sprinkle the fried onion, cashew nuts and raisins and a table spoon or two of mint leaves and coriander leaves. Mix the saffron with milk and pour it over the rice. Close the pan with an airtight lid.  Place the pan / cooker in low heat for 15 - 20 minutes. Serve hot with raita.


Beef Stew (Kerala Style)


Beef Stew is a permanent dish at home for a festive day breakfast; for Christmas & Easter. I prepare this dish whenever i have a craving for it. The rule to eat a beef stew is to soak bread or hopper in it and then eat it. Well it is my way of eating the stew. This tastes good with idiyappam (string hoppers) as well as puttu too.


Ingredients for the stew

Boiled beef* - 400 - 500 gms
Beef stock – 1 cup
Potatoes – 2 or 3 diced
Carrot – 2, chopped
Green chilly – 2
Ginger – 1 inch piece
Onion – 2 medium, julienned
Oil – 2 tbsp

Whole spices

Cinnamon – 1 inch piece
Cloves – 6 medium sized
Green Cardamom – 6 medium sized

Ghee – 2 tsp
Cashew nut – 3 tbsp
Raisins – 3 tbsp

Pepper powder – ¾ to 1 tsp
Thick coconut milk(first extract) – ¾ cup
Thin coconut milk(second extract) – 1 cup

Utensil required – heavy bottom pan or a pressure cooker


the method


Heat ghee in a heavy bottom pan and fry the cashew nuts and raisins. Keep the fried fruits aside. To the same pan add oil. Add the whole spices and stir till the spices release the aroma (take care that the spices do not get burnt). Add the julienned onion, ginger and green chillies. Add the boiled beef, potatoes and carrots. Add water or third extract of coconut if required. Add salt. Cook till the potatoes are done. Add the second extract of coconut milk and bring to boil. Add ¾ tsp pepper powder. Check taste. Add the first extract of coconut milk. Add the fried cashew nuts and raisins. Turn off heat when the stew is about to boil.

an optional note: dilute 1 tsp rice flour to the second extract of coconut milk to thicken the stew ( i have added  rice flour in this recipe)

*ingredients to boil the beef

Beef – 400 – 500 gms
Ginger – half inch piece
Pepper powder – ¼ tsp
Green chilly – 1 medium sized
Salt to taste


Pumpkin & Raisin Bread


Pumpkin, grated – ¾ cup
Wheat flour – 1 cup
Flour – ½ cup
Yeast -1 ½ tbsp
Hot water – ¼ cup + ½ cup
Sugar – 1 heaped tbsp
Salt – ½ tsp
Olive oil / Veg oil – 2 – 3 tbsp + 1 tsp
Butter – 1 tsp
Milk – 1 tbsp

Ingredients to sauté the pumpkin

Veg Oil / Butter / Olive Oil – 1 ½ tbsp
Salt – ¼ tsp
Chilly flakes – 1 tsp
Garlic, grated – 4 cloves
Mixed Italian spices – 1 ½ tsp
Raisins, finely chopped – 10

To sauté the pumpkin


Heat oil in a non-stick pan . Add the grated pumpkin, chilly flakes, salt, garlic and oil and saute for a minute and a half. The pumpkin would have reduced to 3/4th its quantity. Add the chopped raisins, stir for few seconds and turn off heat. Add the mixed Italian spices immediately and stir well. Let it cool.

before baking
In a bowl mix the wheat flour and flour. Add the sautéed pumpkin and mix it with the flour to make crumbs. Make a well in the middle of the flour mix. Add the sugar, salt and yeast. Pour ¼ cup hot water. Stir it gently and cover it. Leave it for 5 – 7 minutes. The yeast would have come on top. Start kneading the flour with the yeast mix and then gradually add the oil and the ½ cup water until a dough is formed. Add 1 or 2 tbsp flour if the dough is sticky. Knead the dough for 7 – 10 minutes. Pour 1 tsp oil over the dough and spread it thoroughly. Cover the dough with a wet cloth and leave it aside for 1 ½ hours. The dough would have doubled. Press down the dough.


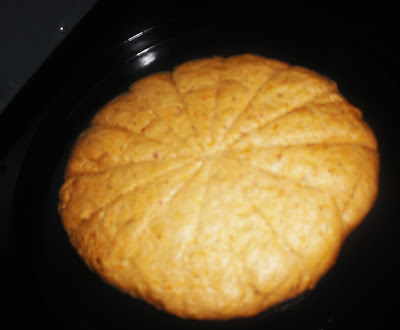
Grease a baking tray. Place the dough in the middle of the tray. Flatten it gently. Use a dough cutter or knife to draw lines over the dough. Leave it aside for half an hour. Apply milk on top of the dough and bake it at 170 C for 22* minutes. Apply butter as soon as the bread is taken out of the oven. Serve hot or cold with butter or tomato sauce.

* Baking time may differ depending on the oven used. Check the bread with a skewer or tap the bottom of the tray to get a hollow sound to check whether the bread is baked..

Chilly Fried Rice with Peanuts & Veggies


I prepared this chilly fried rice with inspirations from Chinese, Thai and Schezwan cuisine. Though the title boasts of many ingredients, this is a simple preparation.....hope you will try and enjoy this!


the recipe

Long grain cooked rice – to serve 8

Chopped or julienned vegetables

Cabbage – ½ cup
Carrot – 1 or 2
Celery – 3 stalks
Spring onion bulb – 4
Capsicum – 1
Onion – 1

Ginger paste – 1 tbsp
Garlic paste – 1 tbsp
Chilly flakes – 2 tsp
Soya sauce – 3 tbsp
Tomato sauce – 1, 2 or 3 tbsp
Sugar – 2 tsp
Salt – to taste
Veg Oil – 3 – 4 tbsp
Vegetable stock or water – ½ cup
Peanuts, roasted & slightly crushed – 5 tbsp
Spring onion shoot chopped – 4 shoots

the method
Heat oil in a wok or wide pan. Add the vegetables and onion and stir well in high heat. The vegetables should remain crispy and partially cooked. Add the crushed peanuts (Put the peanuts in a grinder jar and grind the roasted peanuts for 2-3 seconds). Stir for a while and add the ginger garlic paste. Stir till the raw smell is gone. Add the chilly flakes. Add soya sauce and sugar and stir briskly for 10 seconds. Add adequate salt for the vegetables & rice. Make space in the middle of the pan and pour the vegetable stock. Add the cooked rice in one shot. Mix all the ingredients. Add the tomato sauce. Toss the rice well. Sprinkle the spring onion shoot. Serve hot with tomato sauce or a side dish. We had this with Prawn Ball Curry (recipe to be posted soon).

Vegetable Stew – Kerala Style (without coconut milk)


Vegetable stew has a prominent place in a Malayalee breakfast. It goes well with appam (hoppers), idiyappam (string hoppers) or chappati. You can have this vegetable stew with puttu (steamed rice cake) or whatever you like.

When I mentioned a Kerala style, I wanted to imply that stew of any kind in Kerala is usually prepared with oodles of coconut milk . Since we are in the age of busy lifestyle, grating coconut and extracting milk is a tedious task. Though coconut milk or coconut powder is readily available in the market, I wanted to create something that comes in even more handy. Therefore this vegetable stew is gravied with milk, a dash of rice flour for thickening and a pinch of sugar to bring in the sweet taste which the coconut milk would have added to the stew. This is a quickie recipe which can be prepared in about 30 minutes.

the recipe

potato – 2
carrot – 3
beans – 12
oil – 1 tbsp
onion – 1
green chilly -1 or 2
garam masala – ¼ tsp
salt – ½ tsp

for seasoning

oil – 1 tbsp
ghee or butter (optional) – ½ tsp
onion – 1
curry leaf – 1 sprig
cinnamon – ¼ inch piece
cloves – 3
cardamom – 4 medium sized

other ingredients

milk – ½ cup
rice flour – 1 -1 ½ tbsp
sugar – a pinch
raisins, fried – 4 tbsp
cashew nut or almonds, julienned – 2 tbsp
pepper powder (white or black) – ½ tsp
turmeric powder – 1/8 tsp
salt to taste


the method

In a pressure cooker add 1 tbsp oil and sauté 1 chopped onion and green chilly. When the onions turn translucent, add the chopped vegetables and salt. Saute for two minutes. Add garam masala and stir for few second. Add 1 ½ cup water and pressure cook the vegetable for 2 whistle (as per Indian standard pressure cooker). Turn off heat.

In another pan, heat the oil and ghee. Add chopped onion and curry leaves. Add the whole spices, turmeric and stir well. Add the cooked vegetables. Bring it to boil. Mix the rice flour in 4-5 tbsp water at room temperature. Pour it into the stew and stir. Make sure that the rice solution does not form lumps. In medium heat keep stirring and bring it to boil. Add sugar. Turn to low heat and add milk. Check salt. When bubbles are seen at the side of the pan, turn off heat (overboiling will curdle the milk). Add the fried raisins and almonds. Serve hot as you please.

Lemon Cake with Lemon Curd and Cream


The combination of lemon cake with lemon curd and cream is something to die for!

The idea of preparing a lemon cake is adapted from Food buzz while the lemon curd has been on my to do list for a long time and the cream is of course to give a balance to the extremely citrussy flavor in the cake and the L.Curd.

I got slightly lazy and impatient on the course of preparing this and it has reflected in the way the cream and the icing looks. And of course I have learnt a lot of lessons that should be taken care of while preparing lemon curd and storing it.

For the lemon curd I followed the recipe from Joy of Baking. I did not follow the recipe thoroughly and so I got to learn that the lemon curd has to be strained as soon as it is taken off heat . This is to get rid of any lumps, as well as to strain the zest of lemon which otherwise will increase the sourness of the lemon curd and gives a slight bitter taste as it sits, and it is also easy to pipe the lemon curd when there is no zest in it which is likely to get stuck in the nozzle…….Here is my slightly bad looking yet very tasty lemony cake.


Ingredients for the lemon cake

Flour – 2 cup (200 gms)
Eggs – 2
Baking powder – ½ tsp
Caster sugar – 2 cup
Vegetable oil – 1 cup
Vanilla Extract – ¾ tsp
Juice of 1 ½  lemon
Zest of one lemon

Method to prepare the cake

Preheat the oven at 180 C. Prepare a pan: butter the pan and dust it with flour. Tap out excess flour.

Sift together the flour and baking powder thrice. In a mixing bowl, place beat the eggs one at a time. Add the caster sugar in 3 to 4 steps at speed 1 and then beat the mix at high speed for about 4 minutes till it doubles in volume. Add the vanilla extract and mix well. Pour the oil little by little while still mixing.

Stir in the flour 2 tablespoons at a time and mix it with a wooden spatula. When half of the flour is used up add the flour, followed by a teaspoon of lemon juice. Repeat the process till the flour and lemon juice is over. Stir in the zest of lemon. Pour the batter into the prepared pan and bake at 180C for 25 – 30 minutes or till a toothpick/ skewer comes out clean.

Let the cake cool completely.

Ingredients for Lemon Curd

Egg – 1
Juice of one lemon
Zest of one lemon
Caster sugar – 50 gms
Butter – 1 tbsp

Place the egg in a pan and lightly beat it with a fork. Pour the lemon juice and add sugar. Mix well.

Prepare a double boiler (A pan with ½ to ¾ boiling water – once the water has started boiling turn to low heat).

Place the pan with the egg mix in the double boiler and mix well. When the egg mix begins to form the consistency of custard, add the zest of a lemon. Continue stirring till the mix gains a thick consistency (about 6-9 minutes). Strain it immediately and add the butter and mix well till the butter is melted. Let it cool completely. Place a cling film or plastic wrap on top of the lemon curd to prevent the formation of a thick layer. Place it in the refrigerator till use.

Other Ingredients

Whipped Cream – 1 cup
Few Cherries

Assembling the cake

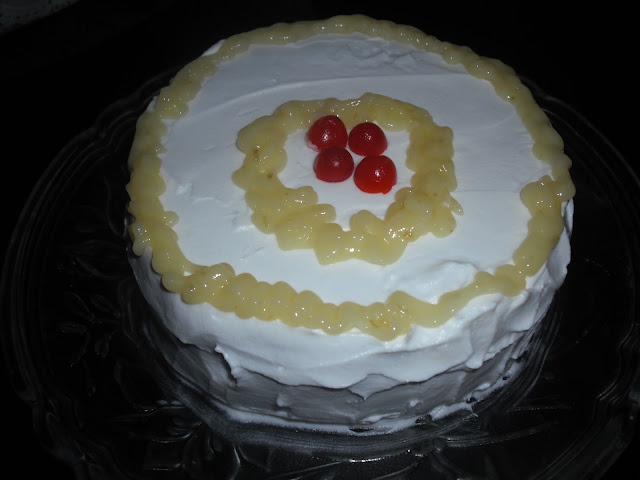
Cut the cake into two. Spread the lemon curd, followed by cream. Place the other piece of cake and smother it with lemon curd as seen in the second picture. Spread the whipping cream in the cake evenly. Place few about 3-4 tablespoons of lemon curd in the icing tube (use a nozzle of your choice) and pipe out a preferred design. Place few cherries on top for a color contrast. Serve immediate or chill it and serve. I like the chilled one. Enjoy!!


the recipe goes to Sinful Delights by Vardhini

Butter Chicken


Butter Chicken is a mild and slightly creamy chicken preparation that can be had with any kind of Indian flat bread like chapati, naan or batura. The addition of butter may not sound healthy, but i feel it is okay to have a little bit of sinful indulgence once in a while.


the recipe

ingredients for the marinade

Chicken - 500 gms
Lemon juice (optional) - 1 tbsp
Salt - 3/4 tsp
Ginger Garlic  paste - 1 tbsp
Garam Masala- 1/2 tsp
Pepper powder - 1/2 tsp

other ingredients

Butter - 1 + 1 + 1 tbsp
Onion - 1 (ground to paste)
Tomato puree - from 2 tomatoes
Kashmiri Chilie powder - 2 tsp
Turmeric powder - 1/2 tsp
Coriander powder - 1/4 tsp
Cumin powder - 1/4 - 1/2 tsp
Garam Masala - 1/4 - 1/2 tsp
Coriander leaves & stem, chopped - 1/4 cup
Cream - 1/4 cup
salt to taste


the method

Cut the chicken into small pieces. Marinate it with the ingredients for the marinade for 30 minutes.

Heat one tbsp butter in a heavy bottom pan / pressure cooked in low heat. Add the marinated chicken and saute for about ten minutes.

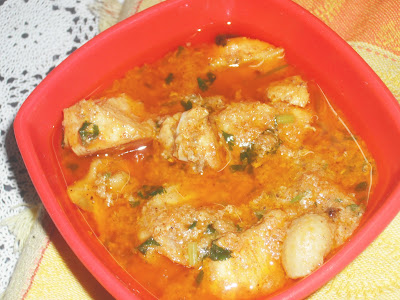
In another pan add one tbsp butter and pour the onion paste. Add some salt so that the water from the onion will evaporate quickly. Saute for a minute or until the raw smell has gone. Pour the tomato puree and add turmeric, coriander, chilly and cumin powder. Let it boil for a while. Add the sauted chicken and mix well. Bring it to a boil. When the chicken is almost done add the garam masala. Reduce to low heat and add the lightly beaten cream. Stir briskly so that the cream will completely blend with the gravy and will not curdle. Check salt and stir in the coriander leaves. As per butter chicken recipes a final dollop of butter is essential. I have also added the same but it melted and came on top of the curry as you can see in the picture. So it is thoroughly optional whether to add another tablespoon of butter before turning off heat. This is a very tasty preaparation. Enjoy as you please.

the same recipe can be followed to prepare Butter Paneer or even a Butter Potato ;-)


Cherry, Cashewnut & Oatmeal Brownies


When you don't have many oatmeal porridge fans at home, the only way to add it in our diet  is to change the logic in which it is cooked. I hide the oats in pancakes, bread, sweet & savory dumplings, soups and also tried adding it in brownies. 

The brownie had a chewy texture. It was much to my dislike....so I leave a choice to you, if you like chewy brownies add oats other substitute it with flour and go ahead with the following recipe.As regards the cherry and cashew, it was very tasty. Cherry in chocolate is a really lovely combination. 

the recipe

bittersweet chocolate - 100 gms
butter - 100 gms
eggs - 2
sugar - 3/4 cup
cocoa powder - 2 tbsp
cherry - 1/4 cup
cashewnuts - 1/4 cup
flour - 1/2 cup
oats - 1/4 cup
vanilla extract - 3/4 tsp

the method

Preheat oven at 170 C. Prepare a square pan and line it with a butter paper.

Chop the chocolate and butter into small cubes and place it in a mixing bowl (this will be the mixing bowl for the entire brownie batter). Place the bowl in simmering hot water. Stir the chocolate and butter until they melt. Take it out of the double boiler and rest it until it becomes warm. 

Certain recipes recommend the use of whisk instead of electric beater to beat the sugar and eggs. But I strongly recommend the use of electric beater at speed 1 or 2.

When the chocolate mix is warm add the sugar spoon by spoon until well incorporated. Add the vanilla extract and eggs. Add the eggs one by one. Mix the flour, cocoa powder and oats. Add it to the chocolate and mix well. Mix the cherry and cashew nuts with a tablespoon of flour and add half of it to the batter. Pour the batter to the prepared pan. Sprinkle other half of cherry and cashew on top of the batter.  Bake for 30 - 35 minutes. Keep checking after 30 minutes. The cherry, cashew and oatmeal brownies are done when a toothpick inserted comes out with few lumps of cooked batter.

The recipe goes to Priya’s CWF – Oats event started by Kiran


Chicken Manchurian


The era of Chilly Chicken almost ended in my kitchen when I started preparing Chicken Manchurian. It must be bcoz chilly chicken was very common and Manchurian was rare. The first manchurian trial took place around ten years back soon after I tasted it at Chiyang - the restaurant I have mentioned while writing about Mixed Noodles. It was a time when recipes could not be searched on web and I was neither a seasoned cook nor a seasoned web/ recipe searcher. Therefore, I tried it with whatever taste I could remember. I am writing this recipe after much research though it is the same as my first trial. I saw the use of tomato sauce in certain Manchurian recipes. It dint appeal to me so here is my Chicken Manchurian recipe with the taste as close to the Chiyang one.


ingredients to marinate the chicken

Chicken (boneless) - 300 - 400 gms
Corn flour (starch) - 3 tbsp
Flour (Maida) - 3 tbsp
Soy Sauce - 2 tbsp
Ginger Garlic paste - 1 1/2 tbsp
Salt to taste

Oil - to deep fry

ingredients for the tempering

Onion, finely chopped - 2
Garlic - 6 - 8 cloves (for garlicky taste add 8, for moderate one add 6)
Green chillies, finely chopped - 2-3
Pepper powder - 1/2 tsp
Soya sauce - 1 tbsp
Corn starch - 1 tbsp
Water - 1/4 - 1/2 cup
Oil - 2 tbsp
Sugar - 1 tsp
Salt to taste

the method

Cut the chicken into bite sized pieces. Add the ginger garlic paste, soya sauce and salt (please keep a check on the quantity of salt since soya is slightly salty). 

Mix the flour (maida) and corn starch powder well. Sprinkle half of the flour mix on the chicken. Turn the chicken pieces and sprinkle the balance flour mix. Mix the chicken pieces well and let it marinate for half an hour*. 

Heat oil in a pan. Deep fry the chicken in medium heat. 

Prepare corn starch solution using 1 tbsp corn flour and 1/4 cup water. If you need a saucy manchurian add 1/2 cup water to make the solution. Some home secrets - you can use the batter / flour left over from the chicken marinade to prepare the corn starch solution. This would be more tasty since the flour contains seasonings like soya sauce and ginger garlic paste. 

For the tempering, heat 2 tbsp oil in a pan and stir in the onion, garlic and green chillies. When translucent, add soya sauce, salt and sugar. Stir well and add the corn starch solution. When it starts to boil, turn to low heat and add the fried chicken pieces. Mix well  and add pepper powder. Serve with fried rice or mixed noodles or as you please.


*Alternatively a thick batter can be prepared with the flour and the chicken pieces can be dipped into  it and fried. I prefer the non-batter method because the fried chicken is crispy and consumes less oil.

Spicy Brinjal and Potato Stir Fry

Brinjal is one of my favourite vegetables. Growing up in the hillstation Valparai we had our own patch of vegetable garden and we use...